We’ve made a lot of references to WordFence on the Reclaim blog, about how it’s a great tool for securing your site* against unmentionables, and how it’s easy to set up and use. But how easy is it, really? There are a lot of options in Wordfence, how do you know you’re setting up the right ones? We’re going to go through that today and get your site hardened against attackers in 10 minutes!
What is Wordfence?
Wordfence is a free security plugin that hardens (makes more secure) your WordPress site against a variety of common attacks. If you’d like to learn more about exactly what it guards against, you can check out their site, but the list of defenses is pretty comprehensive.
Wordfence has a free version and a premium version, and for this post, we’ll just be going over the free features – the premium version does have some nice features (remote scanning, phone support, some other advanced stuff), but we take care of some of that functionality for you, and if you’re a regular WordPress user, these features are probably not necessary. The top feature the premium version has that the free version doesn’t is scheduled scanning, so with the free version, you unfortunately have to run scans manually.
How do I install Wordfence?
To install WordFence or any other WordPress plugins, I recommend checking out our tutorial on how to install plugins, which can be found here. It only takes two minutes to read! Really!
Getting Started
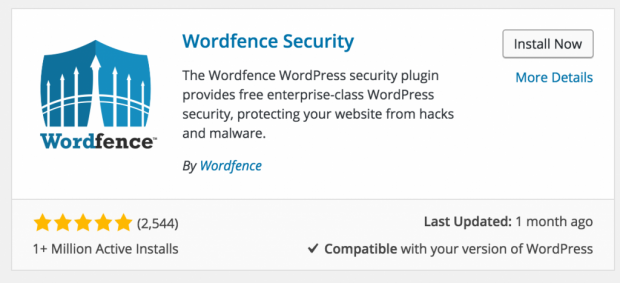
Once I’ve added the plugin by clicking “Plugins” on my dashboard and searching for “WordFence,” I’ll click “Install Now”…
And then “Activate Plugin”…
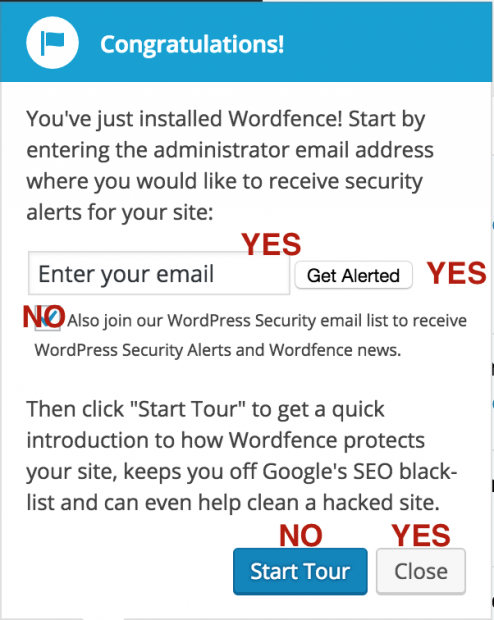
 As soon as I do this, I’ll get a notification on the left that prompts me to put in my email address for alerts, which I recommend, but we’ll need to revisit this a little later. It also asks if I’d like to join an email list, which I’ll opt-out of.
There’s also a button that says “Start Tour“, which I’ll skip for now. Instead, I’ll just click “Close“. WE ONLY HAVE TEN MINUTES. I’ll then click on the new “Wordfence” option in my sidebar.
You’ll be presented with another screen, and at the top it says “Start a WordFence Scan.” Ignore this for now, but DO click on the “Yes, enable auto-update” option. Then, head straight to “Options” under WordFence in the sidebar.
Once you’re on “Options,” leave everything you see at its default, then ALL the way down to the bottom of the screen. There is an option here that says “Import WordFence settings from another site using a token,” which can be found here. Copy the entire string of numbers and letters, paste it into the “import” field, and click “import settings.” Once you’ve done this, don’t forget to click “Save Changes” at the bottom!
Important: if you use the token method, you will need to update your email address in the “where to email alerts” field under “basic options” at the top of the Wordfence settings. If you don’t update your email address, you will not receive email alerts.
The token has all of the recommended security settings enabled for Reclaim Hosting users. If you’d like to get into the advanced features, simply scroll through the “Options” screen and see what’s available. Most of the options are self-explanatory, and if you’d like to know more, click on the little “information” button next to each option. The settings are pre-configured to email you (very occasionally) about important alerts – you can change the email settings at the top of the “Options” menu under “Alerts.”
A note about WordFence tokens – our token token contains generic, recommended settings for Reclaim Hosting users. If you end up with custom features, like whitelisted or blacklisted IPs, or if you’ve filled out any of the custom fields, your token will change. Do not share your updated token with anyone else!!
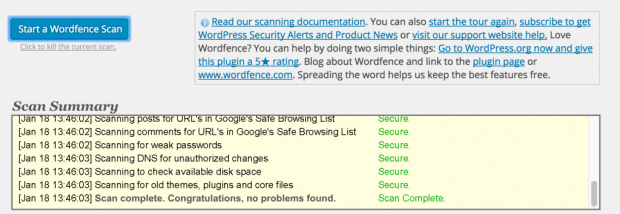
Now, under Wordfence in the sidebar, click on “Scan,” and then click “Start a Wordfence Scan.” The scan will only take a minute, and your results will be displayed immediately.
Looks like I’m all set! Occasionally, Wordfence will detect issues with plugins or themes that are really non-issues. If you work with a lot of plugins or themes, review these issues carefully. If you see any issues in these sections:
Definitely proceed with a repair and/or contact us for support in case we need to restore your site from a backup. BOOM. TEN MINUTES! Or less!
Since you do have to scan manually with the free version, try to run the occasional scan when you’re working on your site. The time and headache saved by detecting issues before they get bad is beyond worth it.
And there you have it! The 10-minute Wordfence express setup. Happy securing!
*Information Security is a comprehensive umbrella of services and technologies, none of which are bulletproof. Wordfence and other security plugins do help prevent the bad guys from breaking in, but there are unfortunately no guarantees in the wild world of web security.


